Showing posts with label foodie's delight.... Show all posts

Monday, 2 July 2012

Potato, leek & cheddar croquettes


I am crazy over mashed potato, or anything potato for that matter. I think it's the Finn in me, we love our starch. It's funny how even the smell of potatoes on the boil takes me back to my childhood. I recall watching my Mum as she peeled boiled potatoes using a knife with the potato stuck on a fork.  I have no idea why I specifically remember that, it's just a vivid childhood memory. Potatoes were a regular with our meals as kids and they're still one of my favourites. 

I stumbled across a croquette recipe in Masterchef Magazine and decided to create my own little recipe. Tried and tested. You’re welcome.

I am hooked on panko bread crumbs at the moment, you can obviously substitute with plain bread crumbs if you don’t have panko. I find panko so much crispier than ordinary bread crumbs. You can make your own fresh crumbs by removing the crusts off day-old bread and processing in a food processor. Also, if you are not a fan of coriander, flat leaf parsley would go well as a substitute. I pretty much add coriander to everything!

Ingredients (makes approx 15 croquettes):
4 medium sized potatoes
2 tbs butter
2 tbs milk (if you want to be super naughty you can use cream)
2 egg yolks, beaten
½ leek, cut lengthways and sliced finely
1 cup vintage cheddar, grated 
¼ cup fresh coriander, chopped
½ cup plain flour
1 cup panko bread crumbs
Sea salt & pepper
Vegetable oil for frying

Add ½ tsp salt to a pot of water and boil potatoes in their skins until soft (15-20 mins). Once soft, peel then mash, adding butter, milk and beaten egg yolks to create a creamy texture. I learnt a little trick from my Mum to get super creamy mashed potato, and that is to use a hand mixer to whip into a smooth blend. I use a stick blender, works perfectly.

Add leek, cheese and coriander to potato mixture, season with lashings of freshly ground sea salt and pepper and combine well. Stir in flour, then refigerate mixture for 30 minutes. Once cool, gently roll 2 tbs of filling into an oval shape and coat with breadcrumbs. Repeat with remainder of the mixture. Tip: do this with wet hands as stops the mixture from sticking to your hands.

Fill a small saucepan 5cm deep with oil and heat over medium heat. Without overcrowding the pan, fry the croquettes for 3 minutes each or until golden brown, turning halfway. Remove with a slotted spoon and drain on paper towel.

Serve. Unless like me you eat them all yourself first!


Joining in Veggie Mama's Meatless Monday linky today. Do yourself a favour and head over to check out some awesome dishes! 


Monday, 11 June 2012

Upside down mushroom tart

I am so very fortunate, I get to manage the social media for a small business that I adore. The Lettuce Shop are purveyors of fresh fruit and veg, delivering quality local and Australian produce to appreciative foodies of Perth. As part of my very fortunate role I get to take photos of food. Photos. Food. Match made in foodie heaven.

On the weekend I decided to try an upside down mushroom tart as featured here, with the intention of sharing it in this week’s newsletter for The Lettuce Shop’s customers. It was so good I just HAD to share it here. You’re welcome.


Ingredients:
1 tbs olive oil
1 leek, thinly sliced
2 cloves garlic, crushed
8 large button mushrooms, stalks cut
6 sprigs thyme
100g soft goats cheese
2 sheets puff pastry, thawed
Wild rocket to serve

Preheat oven at 200C. Heat oil in a medium sized ovenproof frying pan over medium heat. Fry leek and garlic for 3 minutes until soft. Add thyme and mushrooms stalk side down, cook for a further 5 minutes.

Cut both pastry sheets into a circle shape big enough to cover the contents of the frying pan. Stick both sheets together, spread half of the goats cheese over one side of the pastry.

Remove frying pan from heat, place pastry sheets, cheese side down, over the top of the mushroom/leek mix in the pan, tuck edges under to resemble a pie. Transfer the pan into the oven and cook for 20-25 minutes until the pastry is golden in colour and puffy. Remove from oven and cool for 5 minutes.

Place a board or pizza peel over the top of the pan and invert, turning the tart upside down on the board. Crumble the remaining goats cheese over the top and garnish with rocket. Season with pepper and serve.

Gorgeous served with salad. 


Sunday, 4 March 2012

Voileipäkakku - Finnish savoury sandwich cake


My grandmother and Mum did the catering for our wedding. It was an intimate affair at my Mum’s gorgeous abode with family and our closest friends. Our dear friend Owen was in charge of the bar (a job he did well and with pride) and my Mum was the hostess extraordinaire. From as long as I can recall the women in my family have always put on a good spread, Finnish women are born with that natural culinary flair!

One of the dishes my grandmother made which impressed the most was Voileipäkakku, which translates to 'sandwich cake'. It is traditionally a long loaf of bread, sliced horizontally, then layered with various savoury fillings and fabulously garnished. My grandmother made two varieties for our wedding – meat and seafood. Once the layers are filled the cake is covered in cream cheese or dip and decorated with caviar, cherry tomatoes, cucumber, parsley and various other toppings. The cake is sliced vertically to reveal all the layers and the array of colours of the filling.

I wanted to make Voileipäkakku for my Mum’s visit last weekend, but I knew if I made an entire loaf I would wind up eating whatever she didn’t. So instead I made smaller individual cakes. I didn’t follow the traditional Finnish recipe for Voileipäkakku, which involves brushing the day old bread slices with stock, filling, and leaving overnight. This is my own technique based on the idea of Voileipäkakku, without following the traditional method. I made it minutes before my Mum arrived. She devoured it minutes after arriving.

Of course you can use whatever meat and vegetables you like to fill and top Voileipäkakku. I made a meat one for my Mum and a seafood one for my husband. The following ingredients make one individual cake.

Ingredients:
4 slices of white bread
2 slices Jarlsberg cheese
2 slices ham
1 slice sandwich salami 
Cherry tomatoes
Continental cucumber
Mayonnaise
Spreadable cream cheese

Using a large round cookie cutter cut round circles in each slice of bread. Discard the crusts. (I don’t have a cookie cutter so I used an egg ring.)


Place the first layer down, and spread mayonnaise on top. Place ham on the first layer of bread. Place the second slice of bread on top and cover with mayonnaise and slices of jarlsberg cheese (I cut mine into small slices to fit the circle shape, however you can cut bigger slices with the cookie cutter to make circle shapes). Place the third slice of bread on top, cover with mayonnaise and another slice of ham. Top with the fourth slice of bread. Gently cover the entire sandwich with cream cheese. 


Using a vegetable peeler cut long strips of cucumber and place gently around the edge of the sandwich to cover the sides. Garnish the top of the sandwich with any vegetables you like. Radish circles look great, as do halved cherry tomatoes. Top with herbs to add some green colour. I had an idea to cover the sides with thinly sliced boiled egg, however I wasn’t sure if they would stick as well as the cucumber.

This is how it looks cut in half.


For the seafood one I layered the centre with smoked salmon and cheese, and garnished the top with caviar and dill. 


I used fresh white bread however it would be nice with rye bread alternated with white bread. My Mum also suggested making smaller bite size portions, how appealing would they look on a platter with all the colours of the garnish!

Eventually I will make a traditional Voileipäkakku, and of course I will post the recipe. Until then, give this easy but impressive treat a go.


Monday, 27 February 2012

Toscakakku - Finnish almond-topped cake


My Mum lives about 1200km away, so on the odd occasion she comes to town I get a tad excited. When she called to say she would be in town AND she was going to visit, I got to thinking about what I could prepare for her. Being a recent convert to baking, a Finnish treat was the natural choice. I dug into my Nordic Bakery Cookbook and decided to make a Tosca Cake, otherwise know by the Finns as Toscakakku. My grandmother used to make Toscakakku but she used to make it into more of a slice. This version of Toscakakku is a thicker cake variety.

As with most Finnish recipes this one calls for few ingredients, all of which I already had in my pantry and fridge, and is as simple as a cake can get. The smell of the almond/butter topping fresh out the oven is amazing! The husband wanted a slice immediately, I had to disappoint him by telling him he had to wait until the mother-in-law arrived. 

Toscakakku is the perfect morning or afternoon tea accompaniment. I actually pulled out some of my grandmother’s fine china to enjoy it with, the two (cake and china) went hand in Finnish hand. I recall my grandmother baking Toscakakku for her friends when she used to entertain, it is an old reliable favourite.


* Recipe from Nordic Bakery Cookbook with variations to cream and almond portions.

Ingredients:
4 eggs
170g caster sugar
100ml cream
100g unsalted butter, melted, cooled
1 tsp vanilla bean paste (or 2 tsp vanilla extract)
2 tsp baking powder
260g plain flour

Tosca topping:
75g unsalted butter
75g caster sugar
50ml cream
25g plain flour
100g flaked almonds

Method:
Preheat oven to 200oC. Grease 29cm springform tin. 

Whisk eggs and caster sugar well with electric whisk until mixture is fluffy and lighter in colour. Gently fold in cream, melted butter and vanilla bean paste.

In a separate bowl sift flour and baking powder together, fold into the egg mixture. Pour mixture into cake tin and bake for 30-35 minutes.

While cake is baking heat Tosca topping ingredients in a saucepan over low heat, mix well and bring to the boil.

Once cake is cooked remove from oven and gently spread Tosca topping over the top of the cake, return to the oven for a further 15 minutes or until the topping is golden in colour and slightly caramelized.


Cool, slice and devour with a good cup of coffee!

Saturday, 25 February 2012

High Tea at Koko Black


Today my favourite girls and I went to high tea at Koko Black in Claremont. If you live in Perth and like chocolate, I suggest you get yourself down there STAT!
You're welcome.

Monday, 20 February 2012

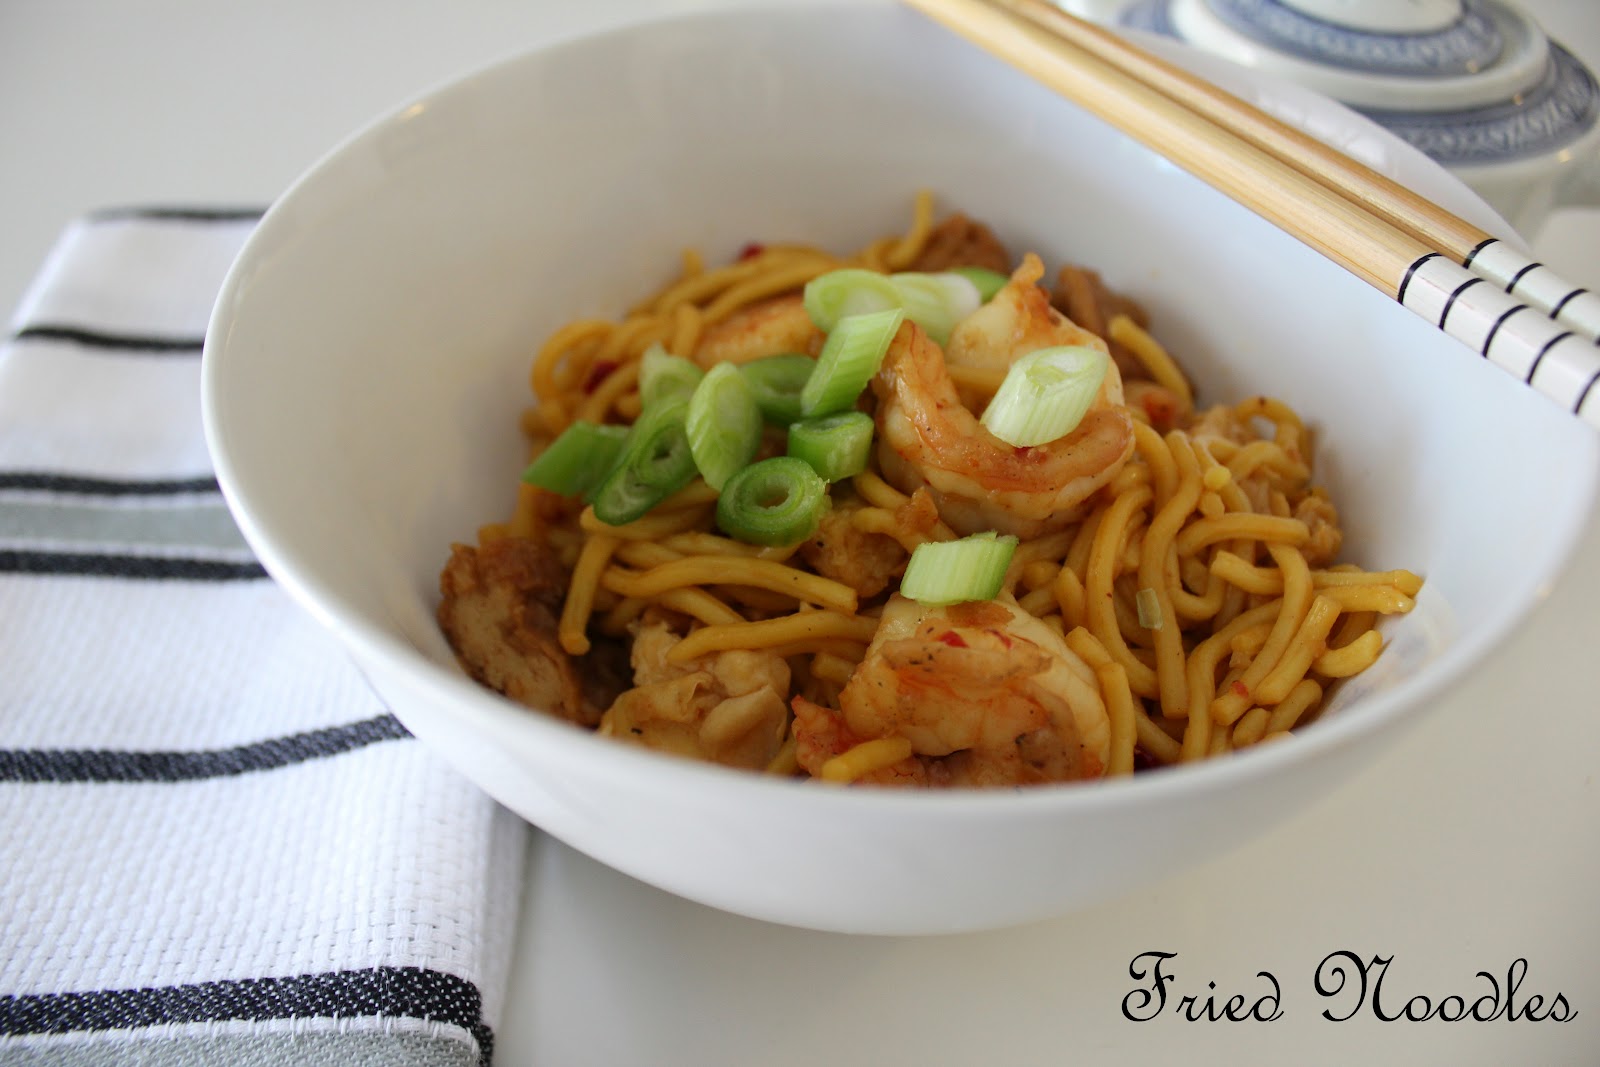
Fried noodles with prawns & tofu


My mother-in-law was renowned for her fantastic culinary skills, so as a result I don’t attempt to try and cook Indonesian dishes. I stick to Finnish fare as I feel I was born with that skill and years of seeing and smelling Finnish food being made has given me an inside edge. I know the Indonesian taste well, I have spent many years travelling in Indonesia (last count I had been to Jakarta over 20 times), but the cooking skills I have left alone. I think I would have a tough critic in my husband, he is fiercely loyal to the taste of Indonesian food.

Last week I bought some fried noodles for lunch. They were good, real good. And as I was eating them I was thinking, I can make this! So I did.

Now I won’t call my dish mee goreng as I was lacking the right ingredients, and I know if my husband stumbles across this he will say “That’s not mee goreng!” so I will simply call them fried noodles. Which translates to mee goreng. Ahem.

Ingredients:
440g egg noodles
12 large prawns, shelled and deveined
1 pack of fried tofu, cut into bite size pieces
2 eggs, lightly beaten
2 cloves of fresh garlic, diced
1” piece of fresh ginger, grated
3-4 stalks of spring onion, sliced
2 tbs oil

To make the sauce: (I am not good at measuring, I just put how much I think feels right, but I tried to estimate measurements for you.)
1 tbs soy sauce
2 tbs kecap manis (sweet soy sauce)
2 tbs sambal oelek (or good chilli sauce will suffice)
1 tsp white sugar
Pinch of salt
Combine well and set aside.

Place egg noodles into a pot of boiling water to separate, remove after 3-4 minutes and strain. Set aside.


Heat a wok and add oil. Add egg to wok and scramble for about two minutes, remove from wok. Add garlic and ginger to wok and fry until fragrant. Add prawns and fry until pink and no longer transparent. Increase heat and add sauce mixture, egg and noodles and combine well. Cook for about 5 minutes, ensuring it does not stick to the wok. Add tofu and spring onion, mix well. Serve and top with fried shallots.


If this was mee goreng I would say ‘enak banget’, but since it is simply fried noodles I’ll say ‘very tasty’!

Tuesday, 31 January 2012

Roasted capsicum & feta fritters


Since I lost interest in meat in my diet I have started to become quite adventurous with vegetable dishes, frequently trying out new things and cooking with veges I haven't ever considered cooking before. And then every so often I come across a really simple vege meal idea. These fritters took me all of about 15 minutes to prepare. Winner.
Ingredients:
2 red capsicum, roasted and chopped
1 red onion, diced
Small bunch coriander, shredded
100g feta, crumbled
1 egg
1 tbs balsamic vinegar
Freshly ground sea salt & pepper
¼ cup plain flour
Mix together capsicum, onion, coriander, feta, egg and balsamic vinegar in a bowl. Season with sea salt and pepper. Mix in flour to achieve fritter consistency, adding more if needed.

Heat a shallow frying pan with oil, scoop spoonfuls of mixture into the hot oil and cook until golden brown (2-3 minutes) then turn.
Place onto paper towel and blot off excess oil. Serve with an awesome summer salad.


The fabulous Veggie Mama has a linky going for bloggers to share awesome vege dishes. Go check out other great recipe ideas. Don't forget to say hello to Veggie Mama!

Friday, 27 January 2012

Australia Day


We had a little visitor on the morning of Australia Day. Her name is Amelie. She made me a fairy bed. We ate strawberries and played Barbie games on the computer. I marvelled at her gorgeous curls. We also ate chilli prawn linguine. Then we ate grapes. After Amelie left my boys and I went to the beach to enjoy a reprieve from the heat topped off with a beautiful display of storm clouds, grizzly sky and rain. It wasn't our usual Australia Day of picnic and fireworks, but it was just as awesome.

I hope yours was lovely.

Sunday, 22 January 2012

BBQ prawns with dipping sauce


My hubby loves to cook, not everyday food but food that you would usually try at restaurants, he loves to experiment with new dishes. I got him Bill's Everyday Asian Cookbook by Bill Granger as a gift, and one afternoon when my nephew was around I showed him a recipe of BBQ prawns with dipping sauce. "You HAVE to make those" he declared. Ok then.

I sent hubby to the fish market, cranked up the BBQ and this is what I made. Easy peasy and oh so delicious!


Ingredients: (serves 3):
750g large prawns, heads and veins removed, shells intact
2 tbs light olive oil

Soy, chilli & garlic dipping sauce:
2 red chillies, chopped
3 cloves garlic, chopped
1 tbs white sugar
2 tbs olive oil
3 tbs soy sauce
1 tbs chopped fresh coriander
2 tbs chopped spring onion

I saw a program recently showing how to devein prawns. It is much easier than I previously thought. I used to take the shell off and then cut the middle and scrape the vein out, but all you need to do is ease the head off gently and the vein comes out as you pull the head off. Too easy.

Toss the prawns in a bowl and coat with oil. To make the dipping sauce blend chilli, garlic and sugar to a paste. Heat oil in a small saucepan, pour hot oil over the chilli mix and stir. Add soy sauce and leave to cool. Once cool add coriander and spring onion.

Preheat a BBQ to hot with the lid down. Grill prawns for 2-3 minutes on each side. Serve the prawns with dipping sauce.

If you have a teenage nephew with a healthy appetite, I can assure this will surely impress!

Wednesday, 11 January 2012

No bake mango cheesecake


I am a huge fan of mangoes. I used to have a tree right outside my house when I lived in the tropics many years ago, and I had never tried mangoes up until then so assumed I didn't like them. They used to fall from the tree and stay where they fell on the ground. Years later I discovered I really love them. Now I miss that tree.

I also never used to like cheesecake and now suddenly I love it. I found this cheesecake recipe here. I changed a few things but basically stuck with the same ingredients. One ingredient I am not fond of is gelatine, it has the strangest smell! Next time I will find a substitute however I used it in this cheesecake.

Now I have to say I am not one to blow my own trumpet, well ok sometimes maybe when I master a new dish, but my husband called me a 'legend' after he sampled a slice of this cheesecake. 'Legend'.


Base:
1 packet Granita biscuits, blend to crumbs
100g unsalted butter, melted

Filling:
200ml whipping cream
250g cream cheese
60g caster sugar
3 medium sized mangoes, pureed (about 300ml)
1 tbs gelatine
3 tbs hot water

Topping:
I mango, sliced
50g mango jelly crystals
2 tsp gelatine
¼ cup hot water
¼ cup cool water

Grease round springform cake tin. ** tip: turn removable base of tin upside down so the cheesecake base won’t stick into the groove that forms at the join. I didn't do this and had a lot of fun trying to ease the cake out of the base of the tin. Mix biscuit crumbs and butter well and press firmly into base of tin. Place into the fridge while making the filling.

Whip cream to medium stiffness (mousse-like texture) and chill. In an another bowl mix cream cheese and sugar together until smooth and creamy.

Dissolve gelatine in hot water and stir until cool. Once cool, mix into mango puree. Add mango puree to cream cheese and sugar mixture and stir until mixed in well. Fold in the whipped cream until well combined. Pour combined mixture into base and chill in the fridge for at least 1 hour, until set.

To make the topping combine the jelly crystals and gelatine, add hot water and stir until crystals have melted and mixture is smooth. Add cool water and stir.

Place the mango slices in decorative pattern on top of set cheesecake, slowly pour jelly topping on to the top of the cheesecake and chill overnight (or at least 4-5 hours to fully set).

I dare you to stop at one slice!